Spectrometry light source HPX-2000xenoncompact
Add to favorites
Compare this product
Characteristics
- Applications
- for spectrometry
- Light source
- xenon
- Other characteristics
- compact
Description
The following sections provide instructions on unpacking and setting up your HPX-2000 HighPower Light Source.
Before using the HPX-2000 for the first time, check for transport damage. Be sure to adhere to all warnings on the unit and in this manual
► Procedure
1. Unpack your lamp assembly carefully. Although the lamp is rigidly mounted, dropping this instrument can cause permanent damage.
2. Inspect the outside of the instrument and make sure that there is no damage. Do not use the instrument if damage is present. Contact your dealer for repair or replacement information, if necessary.
Contents Your HPX-2000 package should contain the following:
HPX-2000 High-Power Light Source
Power cord
UV safety goggles
One IC-DB15-2 interface cable for shutter operation
Quick Start
Moisture 5-95% without condensation at 40°C
Ventilation Unit should be situated so that its location or position does not interfere with proper ventilation.
Temperature 5°C – 35°C. Unit should be situated away from any device that emits excessive heat.
Object and Liquid Entry Unit should be positioned so that objects do not fall on top of the unit. Additionally, ensure that no liquids are spilled into the enclosure through openings.
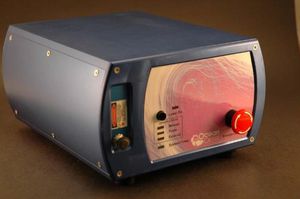
Component Description
Filter Slit Slit to accommodate optical filters.
Power LED Displays state of main power to lamp.
Xenon ON/OFF Press and hold the ON/OFF switch for more than 1 second to turn the lamp on or off.
Shutter Switch OPEN - Shutter open CLOSE - Shutter closed TTL - operation by external TTL- signal (HIGH=OPEN, LOW=CLOSE)
Related Searches
- Spectroscope
- LED illuminator
- Benchtop spectroscope
- Compact illuminator
- Microscope illuminator
- Compact spectrometer
- Research spectroscope
- Optical spectroscope
- Spectrometer for the pharmaceutical industry
- Other light sources light source
- Halogen illuminator
- Raman spectroscope
- Clinical spectrometer
- NIR spectrometer
- High-resolution spectrometer
- UV-vis spectrometer
- Fluorescence spectrometer
- Spectroscopy light source
- CCD spectroscope
- Continuous light source
*Prices are pre-tax. They exclude delivery charges and customs duties and do not include additional charges for installation or activation options. Prices are indicative only and may vary by country, with changes to the cost of raw materials and exchange rates.


